Follow these simple steps to clean up and enhance your audio in the InShot app.
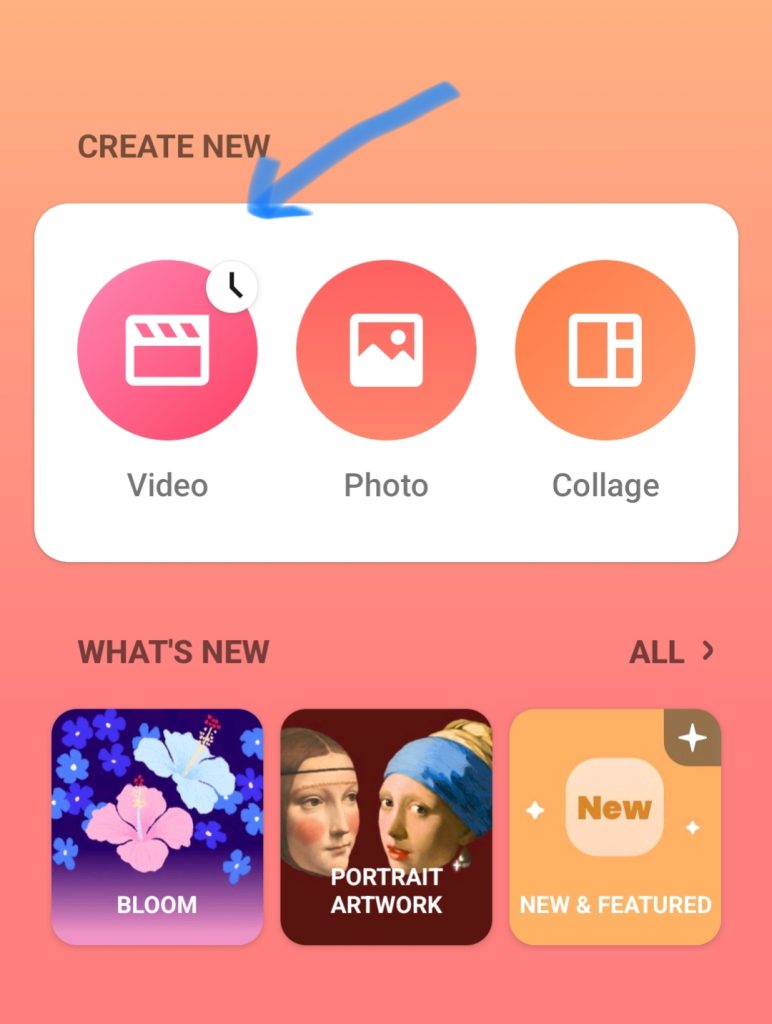
Step 1: Open Your Video in InShot
- Open the InShot app on your phone.
- Tap Video → New, then select the video you want to edit.
- Once loaded, you’ll see the main editing timeline at the bottom.
Step 2: Detach the Original Audio (Optional)
If you want to completely remove or replace the original sound:
- Tap the video clip in the timeline.
- Select the “Detach Audio” option.
- You’ll now see the audio track appear separately below the video.
This allows you to edit or delete the audio without affecting the visuals.
To remove it completely, just tap the detached audio track and select Delete.
Step 3: Mute Unwanted Parts
Sometimes, you may not want to remove all sound — only noisy sections. For example, a sudden car horn or background chatter.
To mute specific parts:
- Split the video at the point where noise begins and ends.
- Select that portion and tap the Volume icon.
- Slide the volume to 0 to mute it.
You can then add background music or a voiceover over that section to maintain flow.
Step 4: Adjust the Volume Levels
If some clips are too loud or too quiet:
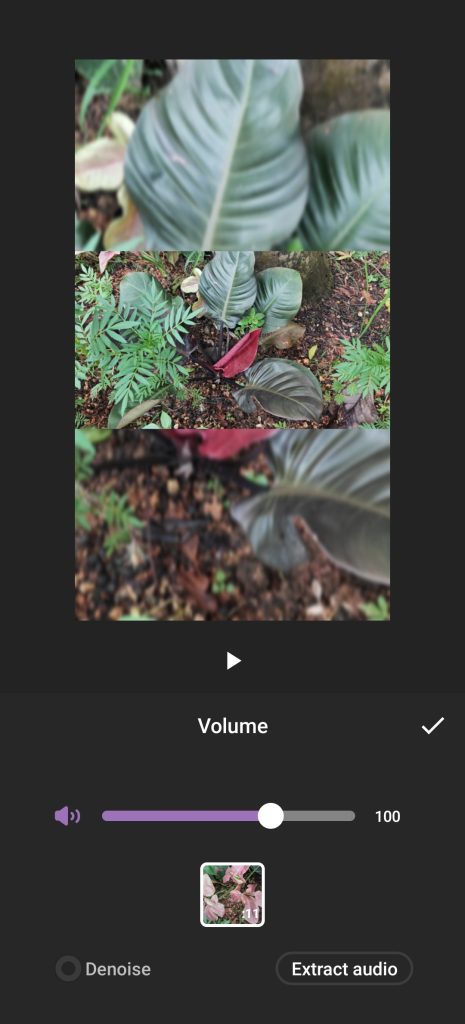
- Tap the video or audio clip.
- Select Volume and adjust the slider for balance.
Try to maintain a consistent volume level throughout your video — this helps avoid sudden jumps in sound that can irritate viewers.
Step 5: Add Background Music or Ambient Sound
Once you’ve cleaned the unwanted noise, you can fill the silence with background music.
To add music:
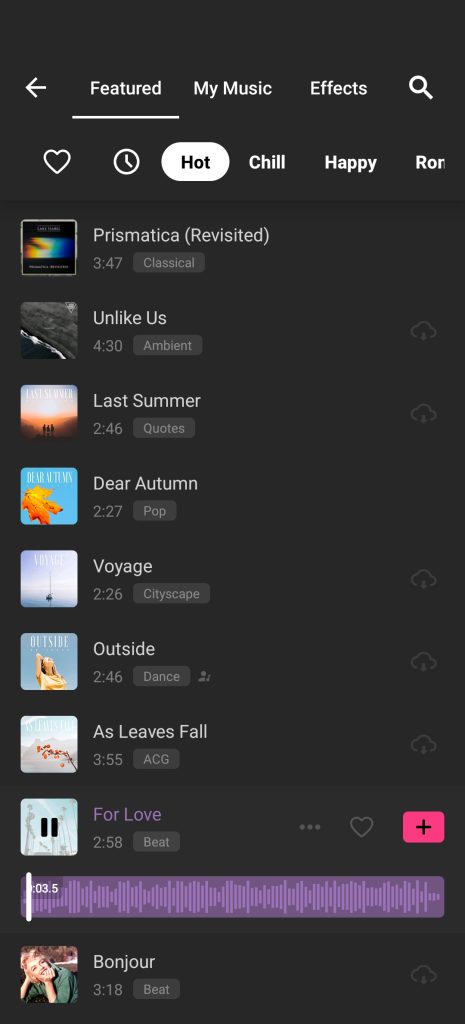
- Tap Music → Tracks.
- Choose from InShot’s built-in music library or import from your device.
- Adjust the volume so that it doesn’t overpower your voice.
You can also add sound effects (like wind, applause, or clicks) for realism, or use soft background tunes to give a professional touch.
Step 6: Record or Add a Voice-Over
If your original voice recording is too noisy, it’s better to record a clean voice-over instead of keeping the old audio.
To add a voice-over:
- Tap Music → Record.
- Press the red Record button and speak clearly in a quiet room.
- Tap Stop when done, and your voice will appear as a new track.
You can reposition or trim it to sync perfectly with your video.
Step 7: Apply Fade-In and Fade-Out Effects
Smooth audio transitions give a professional touch.
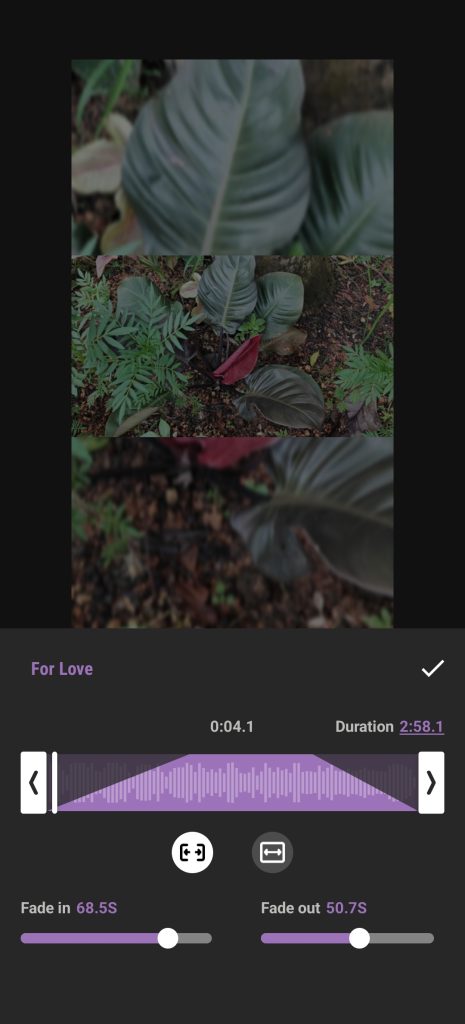
- Select your background music or voice track.
- Tap Fade In or Fade Out.
- Adjust how gradually the sound starts or ends.
This avoids abrupt sound changes and gives your video a cinematic feel.
Step 8: Fine-Tune the Audio Mix
After cleaning and adding new sounds, spend a few minutes balancing everything:
- Keep your voice as the main focus.
- Lower the background music volume slightly.
- Ensure sound effects are subtle and not too frequent.
Use headphones to check how your audio sounds before exporting.
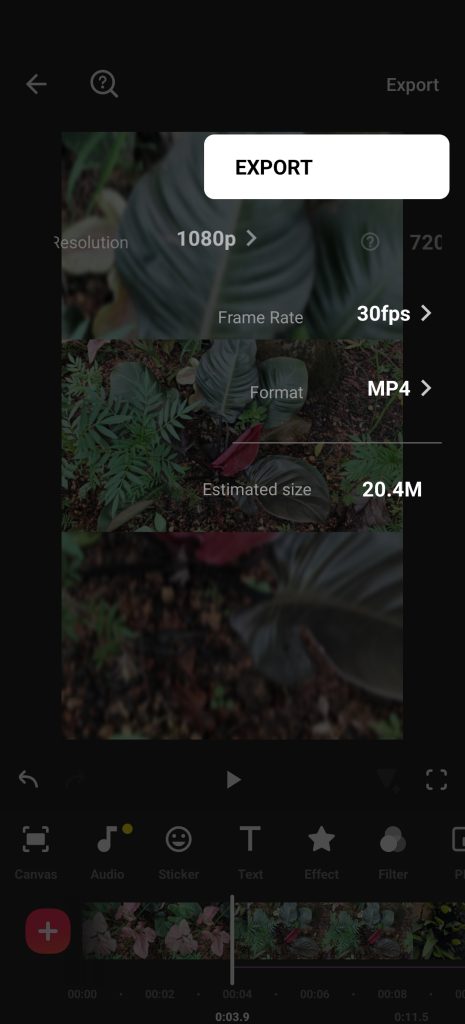
Step 9: Export in High Quality
Once your sound is perfect, tap Export at the top right corner.
Choose 1080p or 4K resolution and ensure the bitrate is high for better audio clarity.
Your video is now ready to be shared on YouTube, Instagram, or any platform — with clear and crisp audio.
Extra Tips for Better Audio Recording
Improving sound quality starts before editing. Here are a few simple but effective recording tips:
- Use an External Microphone:
Even a budget clip-on mic sounds far better than your phone’s built-in mic. - Record Indoors or in Quiet Places:
Choose a room with minimal echo. Close windows and turn off fans or AC. - Avoid Background Apps:
Notifications or ringtones can ruin your recording. Always record in “Do Not Disturb” mode. - Use a Pop Filter or Foam Cover:
This helps reduce breath and popping sounds while speaking. - Record Short Sections:
If you make a mistake, it’s easier to re-record small parts instead of the whole video.
When you combine these tips with InShot’s editing tools, your final output will sound sharp and professional.
Why InShot Is a Great Choice for Audio Editing
While there are many editing apps available, InShot stands out because:
- It’s beginner-friendly — simple interface, no learning curve.
- You can edit both video and audio in one place.
- Offers royalty-free background music and sound effects.
- Compatible with most mobile devices.
- Exports in high-quality formats suitable for YouTube or social media.
For creators who want a quick and effective way to clean up sound without using a computer, InShot is a perfect solution.
Conclusion
Good sound can make or break your video. With InShot’s powerful yet easy-to-use tools, you can remove unwanted sounds, adjust audio levels, and add professional touches like background music and fade effects — all within minutes.
Whether you’re a YouTuber, educator, vlogger, or social media creator, learning to improve audio quality using InShot will help you deliver content that feels professional, polished, and enjoyable to watch.
So next time you record, don’t worry about small noises — just open InShot, follow these steps, and transform your video’s audio into studio-quality sound.