Picture-in-Picture Tool in InShot
Video editing has become an essential part of content creation today. Whether you’re making YouTube videos, Instagram Reels, or short tutorials, adding overlays like small videos or images can make your content more engaging and professional. One of the most popular and beginner-friendly video editing apps that offers this feature is InShot.
In this article, we’ll explore how to overlay videos and images using the Picture-in-Picture (PIP) tool in InShot, step by step. You’ll also learn a few tips to make your edits look more creative and polished — perfect for creators who want their videos to stand out.
What Is Picture-in-Picture (PIP) in InShot?
The Picture-in-Picture (PIP) tool allows you to place one video or image on top of another video. In simple words, it helps you add a smaller clip or image overlay that appears inside your main video frame.
For example:
- You can add a small video of yourself explaining something over a tutorial video.
- You can insert your brand logo or watermark image in the corner.
- You can show two videos playing at the same time — one as the main and another in a small window.
This feature is widely used by vloggers, educators, gamers, and digital marketers because it adds a professional and dynamic look to videos without needing complex desktop software.
Why Use the PIP Feature in InShot?
Before we go into the steps, let’s look at why PIP is so useful:
- Professional Appeal:
Overlays make videos look neat and modern — similar to what we see in professional edits. - Multi-Angle Storytelling:
You can show two scenes together, like your face cam and screen recording, to make your content more interactive. - Branding:
Adding your logo as a PIP overlay helps protect your video and promote your brand identity. - Tutorials and Reviews:
If you’re explaining something, you can keep a small video of yourself while showing the main process in the background. - Highlighting Key Moments:
You can overlay images or text-based screenshots to emphasize important points.
How to Overlay Videos and Images Using Picture-in-Picture in InShot
Let’s go step-by-step through the process. Make sure you have the latest version of InShot installed on your Android or iPhone before starting.
Step 1: Open the InShot App
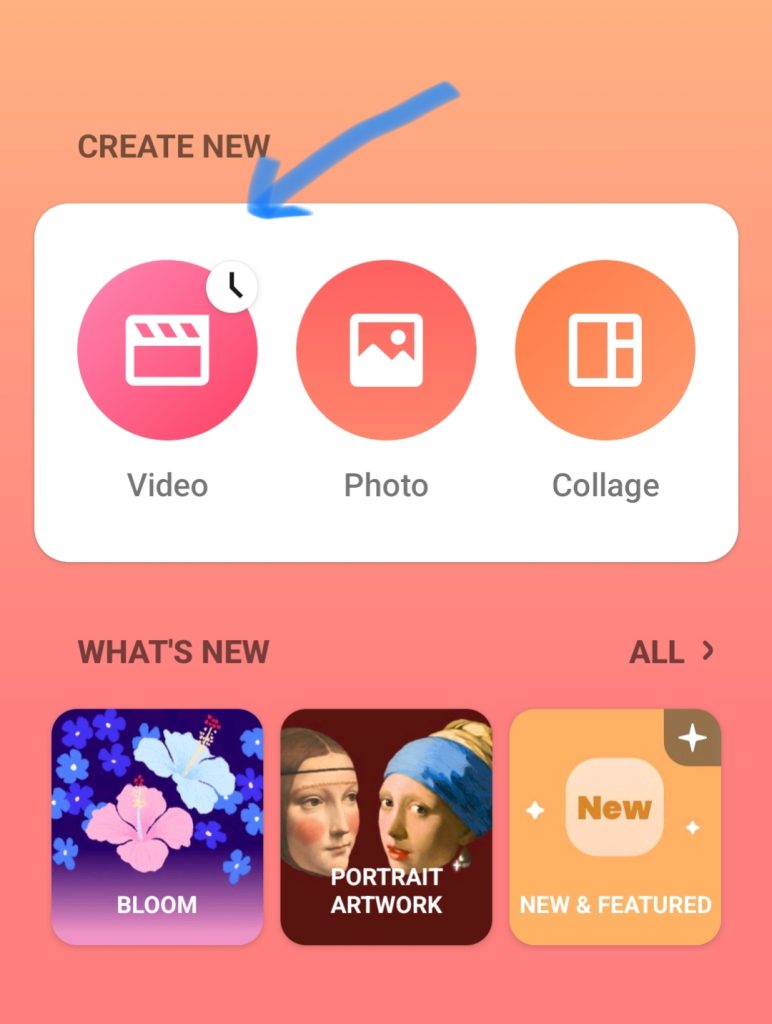
Launch the InShot app from your mobile. On the main screen, you’ll see three main options: Video, Photo, and Collage.
Tap on Video, then choose New to start a new project.
Step 2: Import Your Main Video
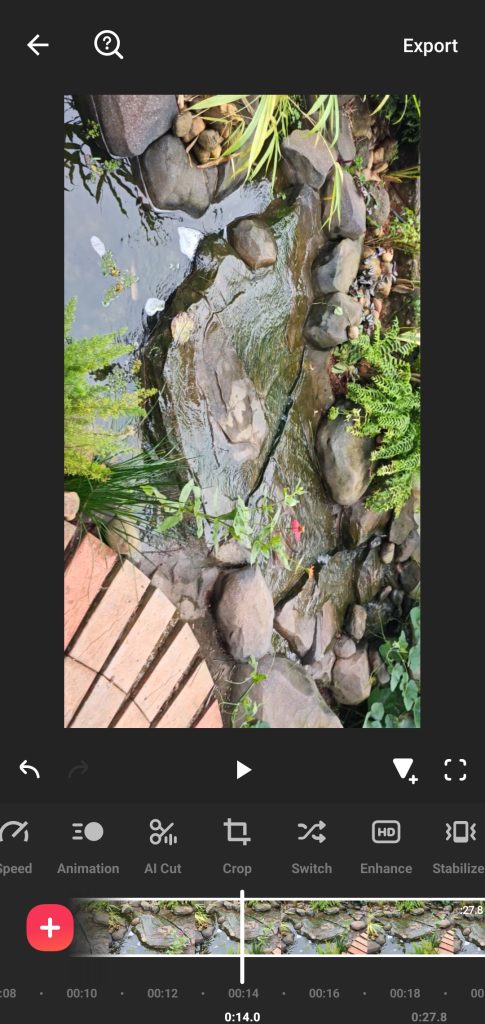
Select the primary video you want to edit — this will be the background or base layer.
Once you import it, you’ll be taken to the main editing timeline where you can trim, crop, or adjust your video before adding any overlays.
If needed, you can also adjust the aspect ratio (e.g., 16:9 for YouTube, 1:1 for Instagram, 9:16 for Reels).
Step 3: Add an Overlay Using the PIP Tool
Now comes the interesting part — adding your overlay.
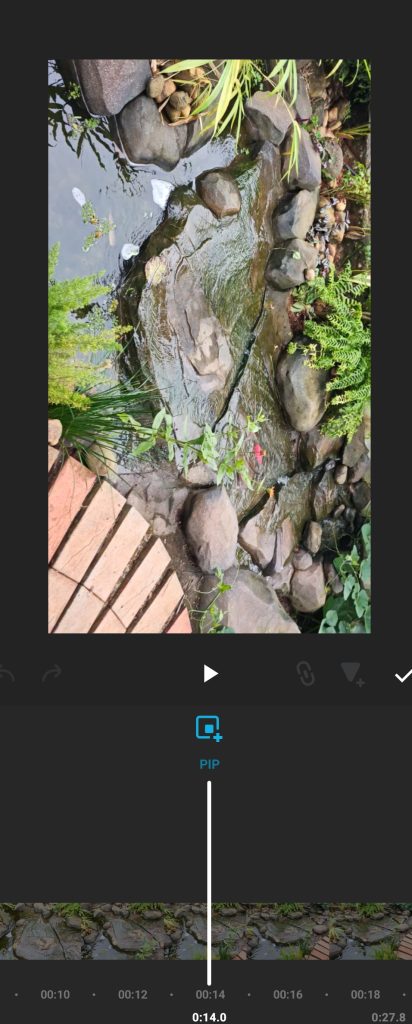
- Tap on the “PIP” (Picture-in-Picture) option in the toolbar.
- You’ll be asked to select a video or image from your gallery.
- Choose the file you want to overlay.
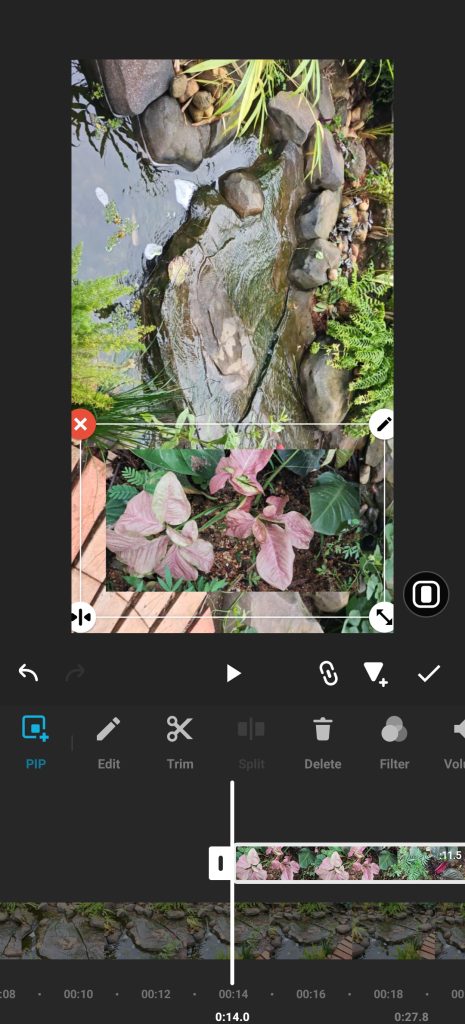
The selected clip or image will appear on top of your main video in a small movable frame.
Step 4: Adjust the Size and Position
You can drag, resize, and reposition the overlay anywhere on the screen.
- Use two fingers to pinch and zoom.
- Drag to move the overlay to your desired position — for example, the bottom right corner for a face cam or top corner for a logo.
You can also rotate the overlay slightly for creative effects.
Step 5: Trim and Sync the Overlay
InShot allows you to trim or adjust when the overlay appears.
- Tap on the overlay clip in the timeline.
- Use the handles to adjust its start and end points to match the timing of your main video.
If you’re adding a reaction video or commentary, syncing your overlay properly makes a big difference.
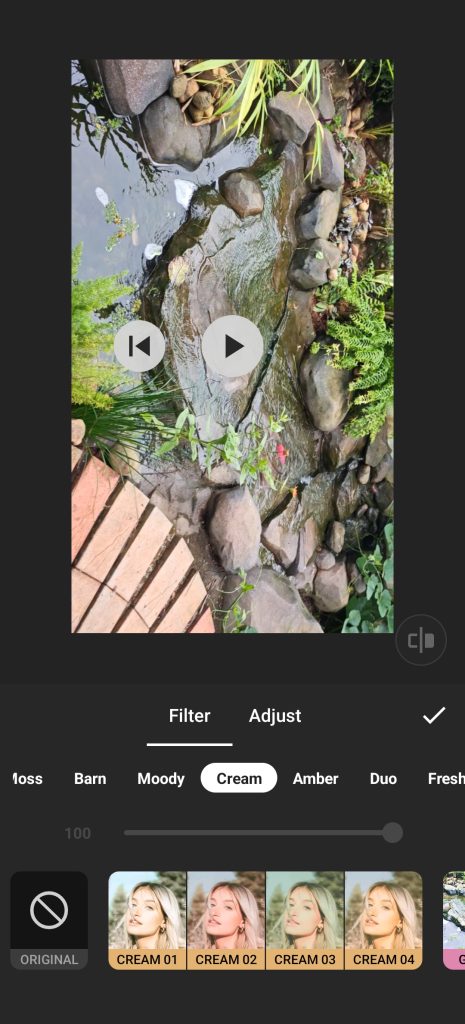
Step 6: Add Borders, Filters, and Effects
InShot’s PIP tool isn’t limited to placing an image or video — you can also enhance it:
- Filters: Apply filters to match your overlay’s tone with the main video.
- Borders: Add a frame or border to make your overlay stand out.
- Transparency: Adjust opacity for a softer look, useful for logos and watermarks.
- Blend Modes: Experiment with blend options like lighten, darken, or overlay to create cool effects.
These small touches help your video look more visually appealing.
Step 7: Add Text, Stickers, or Animations
To make your overlays more engaging:
- Add text captions to explain what’s happening.
- Use stickers or emojis for fun elements.
- Apply animations like “fade in” or “zoom” to make your PIP video appear smoothly.
For example, if you’re creating a tutorial, you can add an animated pointer image over your main screen video.
Step 8: Preview and Fine-Tune
Once everything looks good, tap Play to preview your video.
Check that the overlay doesn’t block important parts of the main video. Adjust the size or timing if necessary.
This preview step helps you make sure the final output looks neat and balanced.
Step 9: Export and Save Your Video
When you’re happy with the edit, tap the Export button (usually at the top-right corner).
Choose the resolution — 720p, 1080p, or even 4K depending on your device and needs.
After exporting, you can share your video directly on platforms like YouTube, Instagram, Facebook, or WhatsApp.
Creative Ideas for Using Picture-in-Picture in InShot
Here are a few ideas to make your videos more engaging:
- Reaction Videos: Add your camera feed in the corner while reacting to another clip.
- Tutorials: Show your face explaining while demonstrating something on screen.
- Comparison Videos: Place two clips side by side to compare products or scenes.
- Branding: Add your logo in every video using PIP for a consistent look.
- Before-and-After Videos: Overlay “before” and “after” clips to highlight transformations.
These ideas help you use the PIP tool not just for technical editing but also for storytelling.
Tips for Professional Results
- Keep the overlay size moderate — not too big or small.
- Maintain visual balance so your main video remains the focus.
- Use consistent positions for overlays in your videos to build brand recognition.
- Avoid adding too many overlays; simplicity often looks better.
- Export in high quality for a sharp and clear finish.
Conclusion
Using the Picture-in-Picture tool in InShot is one of the easiest ways to make your videos look professional without needing expensive software. Whether you’re a YouTuber, teacher, or social media creator, this tool helps you tell your story in a more creative way.
By following the steps and tips in this guide, you can overlay videos and images seamlessly — adding that extra touch of professionalism to your content. So, open InShot today and start experimenting with PIP. You’ll be surprised at how much difference a simple overlay can make!